IaC with Terraform
Introduction to Terraform
- Terraform is a tool that helps you automate and manage your infrastructure, your platform and services that you run on that platform
- It's open-source
- Declarative
- Define what end result you want
- It's a tool for infrastructure provisioning
- Creating apps
- Prepare infrastructure
- Includes Private network space
- EC2 server instances
- Install Docker and other tools
- Security
- Deploy applications
- Prepare infrastructure
- Can have 2 teams or 2 individuals to handle tasks separately
- Terraform handles the first part
- Difference between Ansible and Terraform
- Both are Infrastructure as a Code tools
- Both automate provisioning, configuring and managing the infrastructure
| Ansible | Terraform |
|---|---|
| Mainly a configuration tool for already provisioned infrastructures | Mainly an infrastructure provisioning tool |
| Deploy app | CAN deploy apps |
| Install/update software | |
| More mature | Relatively new |
| Install/update software | More advanced in orchestration |
- DevOps engineers can use both: each for their own strength
Managing Existing Infrastructure
- Create infrastructure
- Make changes to infrastructure
- e.g. add more servers
- Replicating infrastructure
- Can have
devandproductionenvironments
- Can have
Terraform Architecture
- Has 2 main components
- Core
- Uses 2 input sources
- Terraform Config: What to create/configure?
- Terraform State: current state of infrastructure setup
- Creates an execution plan:
- What needs to be created/updated/destroyed?
- The core compares the current state VS the desired state (config file)
- If there is a difference, it figures out what needs to be done to achieve the desired state
- Uses 2 input sources
- Providers
- Providers for specific technologies
- Cloud providers like AWS (IaaS)
- Providers for certain Platform as a Service (PaaS) tools
- Even some SaaS tools like Fastly
- Providers for specific technologies
- Core
- Has over 100 providers
- Through the providers you get access to resources (over 1000 resources)
- Core creates an execution plan based on the input from the config file and state, it then uses providers for specific technologies to execute the plan
Declarative vs Imperative
- Declarative
- You define the end state you desire in your config file
- To update, adjust old config file and re-execute
- Always know current setup
- Imperative
- Define exact steps (the how)
- To update, you manually run multiple commands
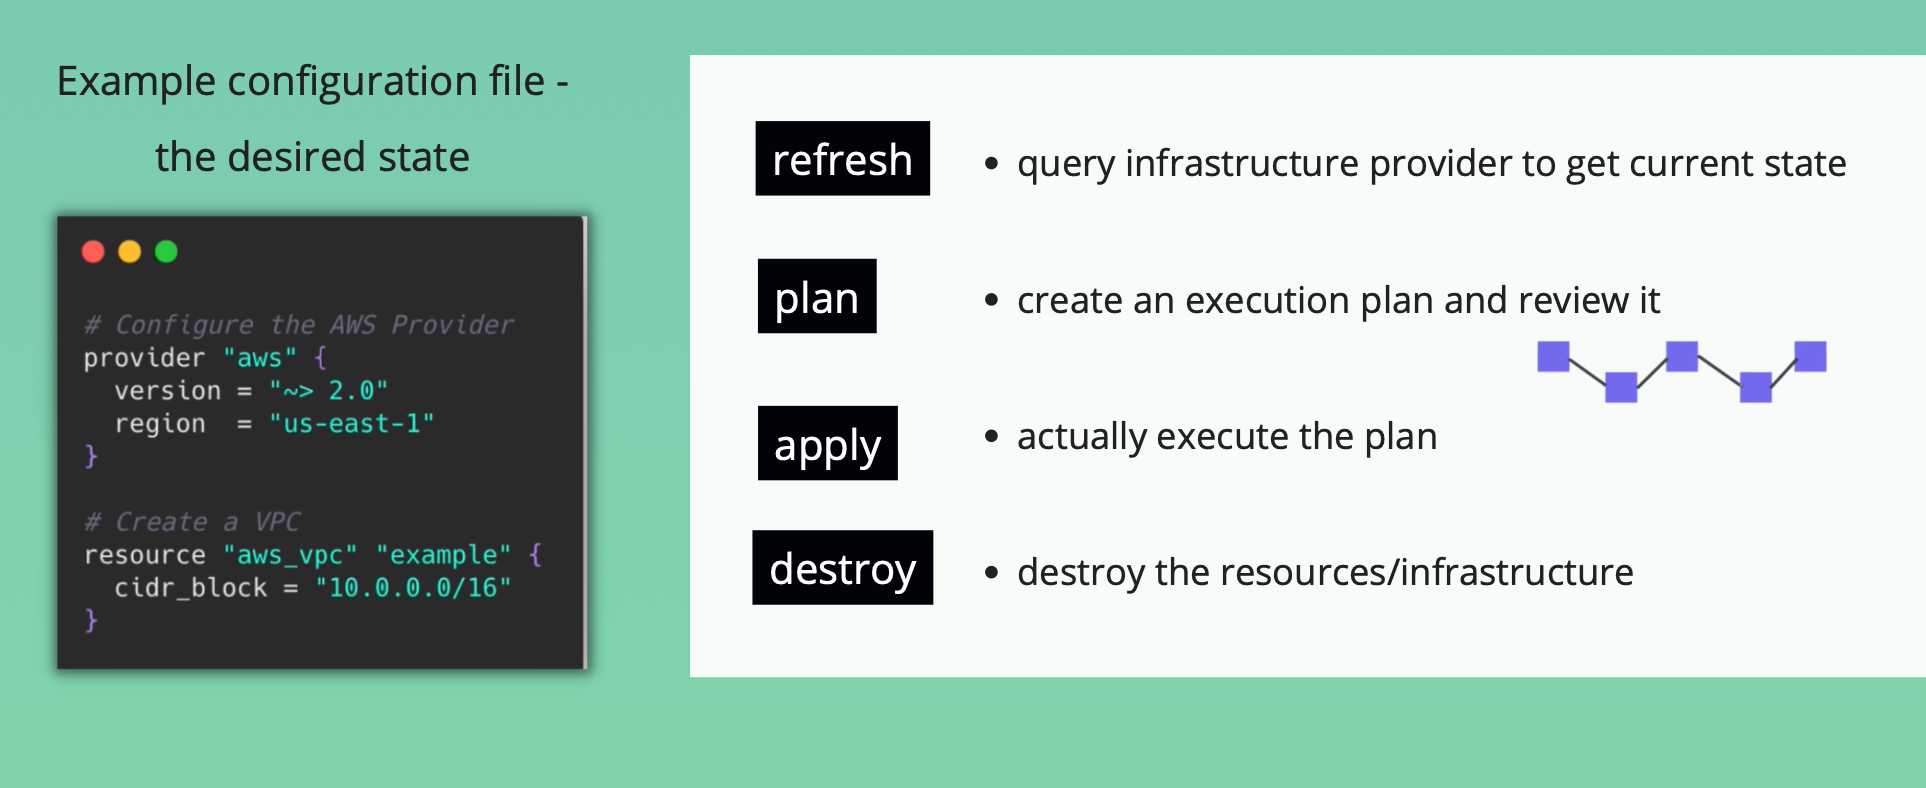
Terraform Commands for different stages
Key Takeaways
- Terraform is a tool for creating and configuring infrastructure
- Universal IaC tool
Install Terraform
brew tap hashicorp/tap
brew install hashicorp/tap/terraform
Update
brew update
brew upgrade terraform
Learn Terraform by example
- Connect to AWS Account
- Create a VPC
- Create a Subnet
Providers
- We need to connect to our AWS account
- Exposes resources for specific infrastructure platform (e.g. AWS)
- Responsible for understanding API of that platform
- What's a provider?
- Code that knows how to talk to a specific technology or platform
- Providers
Install and Connect to Provider
- Don't hardcode credentials
- Providers are not included in the Terraform download
- They need to be installed
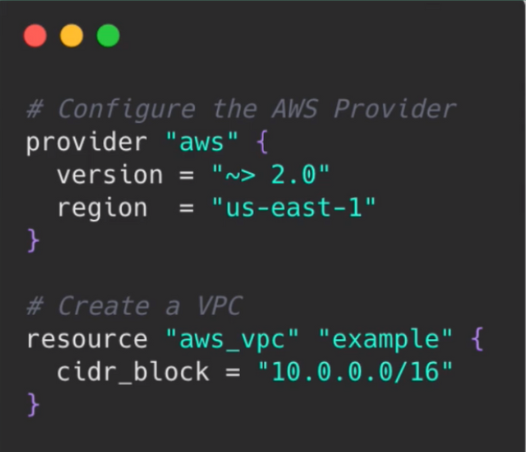
main.tf
provider "aws" {
  region = ""
  access_key = ""
  secret_key = ""
}
Install Provider
terraform init # initializes a working directory. Installs providers defined in Terraform config
- After the provider is installed you can use the resources it provides
- The AWS Provider for example, gives us access to the complete AWS API
Resources and Data Sources
-
Resource name
<provider>_<resourceType>
-
Create VPC and subnet
main.tf
provider "aws" {
  region = "us-east-1"
  access_key = ""
  secret_key = ""
}

resource "aws_vpc" "development-vpc" {
  cidr_block = "10.0.0.0/16"
}

resource "aws_subnet" "dev-subnet-1" {
  vpc_id = aws_vpc.development-vpc.id
  cidr_block = "10.0.10.0/24"
  availability_zone = "us-east-1a"
}
Terraform apply
- Will ask for confirmation
terraform apply
- TF determined what actions are necessary to achieve our desired state
Data Sources
- What if you wanted to create a subnet for a existing VPC?
- Could get the VPC id from the dashboard
- Its inefficient
- Data Sources allow data to be fetched for use in TF configuration
- Provider components
resource- Let's you create resources
data- Let's you query the existing resources and components
main.tf
provider "aws" {
  region = "us-east-1"
  access_key = "XXX"
  secret_key = "XXX"
}

resource "aws_vpc" "development-vpc" {
  cidr_block = "10.0.0.0/16"
}

resource "aws_subnet" "dev-subnet-1" {
  vpc_id = aws_vpc.development-vpc.id
  cidr_block = "10.0.10.0/24"
  availability_zone = "us-east-1a"
}

data "aws_vpc" "existing_vpc" {
  default = true
}

resource "aws_subnet" "dev-subnet-2" {
  vpc_id = data.aws_vpc.existing_vpc.id
  cidr_block = "172.31.96.0/20"
  availability_zone = "us-east-1a"
}
Recap
- Config syntax is the same for all providers
- provider = import library
- resource/data = function call of library
- arguments = parameters of function
- Terraform compares current AWS state vs desired state
- Terraform is idempotent
- When you apply the same config 100 times, you'll get the same result
Change / Destroy a terraform resource
- Changes resources
main.tf
provider "aws" {
  region = "us-east-1"
  access_key = "XXX"
  secret_key = "XXX"
}

resource "aws_vpc" "development-vpc" {
  cidr_block = "10.0.0.0/16"

  tags = {
    Name: "development",
    vpc_env: "dev"
  }
}

resource "aws_subnet" "dev-subnet-1" {
  vpc_id = aws_vpc.development-vpc.id
  cidr_block = "10.0.10.0/24"
  availability_zone = "us-east-1a"
  tags = {
    Name: "subnet-1-dev"
  }
}

data "aws_vpc" "existing_vpc" {
  default = true
}

resource "aws_subnet" "dev-subnet-2" {
  vpc_id = data.aws_vpc.existing_vpc.id
  cidr_block = "172.31.96.0/20"
  availability_zone = "us-east-1a"
  tags = {
    Name: "subnet-2-dev"
  }
}
- Symbols
+- Add~- Change-- delete
terraform apply
Removing/Destroying Resources
- 2 ways
- Remove the resource from the terraform file
- Using the terraform command
terraform destroy
terraform destroy -target <resource_type>.<resource_name>
- Best practice: always apply Terraform config file
- If you use terraform command, your terraform config will not correspond to the actual state of your infrastructure
More terraform commands
Difference between desired and current state
terraform plan
Terraform apply without confirmation
terraform apply -auto-approve
Destroy infrastructure
terraform destroy
State
- 2
tfstatefiles have been deployed- JSON file where Terraform stores the state of the real world resources of your managed infrastructure
- Gets updated when we change or update the config
- Backup file contains information about the previous state
State subcommands
terraform state
terraform state list
terraform state show <state name>
Output
- Allows us to output a set of attributes and their values of the resources we've created
- Output values are like function return values
- Output can't have multiple values
main.tf
output "dev-vpc-id" {
  value = aws_vpc.development-vpc.id
}

output "dev-subnet-id" {
  value = aws_subnet.dev-subnet-1.id
}
Variables in Terraform
- Input variables are like function arguments
- Helps with reusability
main.tf
variable "subnet_cidr_block" {
  description = "subnet cidr block"
}

resource "aws_subnet" "dev-subnet-1" {
  vpc_id = aws_vpc.development-vpc.id
  cidr_block = var.subnet_cidr_block
  availability_zone = "us-east-1a"
  tags = {
    Name: "subnet-1-dev"
  }
}
3 ways to pass value to the input variable
terraform apply- We get a prompt to provide value to variable
- Command line argument in terraform apply
terraform apply -var "subnet_cidr_block=10.0.10.0/24"
- Define a
variablesfile and assign values inside that fileterraform.tfvars
main.tf
variable "subnet_cidr_block" {
  description = "subnet cidr block"
}

variable "vpc_cidr_block" {
  description = "vpc cidr block"
}

resource "aws_vpc" "development-vpc" {
  cidr_block = var.vpc_cidr_block

  tags = {
    Name: "development",
    vpc_env: "dev"
  }
}

resource "aws_subnet" "dev-subnet-1" {
  vpc_id = aws_vpc.development-vpc.id
  cidr_block = var.subnet_cidr_block
  availability_zone = "us-east-1a"
  tags = {
    Name: "subnet-1-dev"
  }
}
terraform.tfvars
subnet_cidr_block = "10.0.10.0/24"
vpc_cidr_block = "10.0.0.0/16"
Use Case for Input Variables
- When you want to replicate the same infrastructure for different environments (dev, staging, prod)
- You'll have variable files for all three environments eg. terraform-dev.tfvars
terraform apply -var-file terraform-dev.tfvars
Default Values
- Default value will be used if Terraform does not find a value
variable "subnet_cidr_block" {
  description = "subnet cidr block"
  default = "10.0.10.0/24"
}
Type Constraints
- Lists
main.tf
provider "aws" {
  region = "us-east-1"
  access_key = "XXX"
  secret_key = "XXX"
}

variable "cidr_blocks" {
  description = "cidr blocks for vpc and subnets"
  type = list(string)
}

resource "aws_vpc" "development-vpc" {
  cidr_block = var.cidr_blocks[0]

  tags = {
    Name: "development",
    vpc_env: "dev"
  }
}

resource "aws_subnet" "dev-subnet-1" {
  vpc_id = aws_vpc.development-vpc.id
  cidr_block = var.cidr_blocks[1]
  availability_zone = "us-east-1a"
  tags = {
    Name: "subnet-1-dev"
  }
}

output "dev-vpc-id" {
  value = aws_vpc.development-vpc.id
}

output "dev-subnet-id" {
  value = aws_subnet.dev-subnet-1.id
}
terraform-dev.tfvars
cidr_blocks = ["10.0.0.0/16", "10.0.10.0/24"]
Objects
main.tf
provider "aws" {
  region = "us-east-1"
  access_key = "XXX"
  secret_key = "XXX"
}

variable "cidr_blocks" {
  description = "cidr blocks and name tags for vpc and subnets"
  type = list(object({
    cidr_block = string
    name = string
  }))
}

resource "aws_vpc" "development-vpc" {
  cidr_block = var.cidr_blocks[0].cidr_block

  tags = {
    Name: var.cidr_blocks[0].name,
    vpc_env: "dev"
  }
}

resource "aws_subnet" "dev-subnet-1" {
  vpc_id = aws_vpc.development-vpc.id
  cidr_block = var.cidr_blocks[1].cidr_block
  availability_zone = "us-east-1a"
  tags = {
    Name: var.cidr_blocks[1].name
  }
}

output "dev-vpc-id" {
  value = aws_vpc.development-vpc.id
}

output "dev-subnet-id" {
  value = aws_subnet.dev-subnet-1.id
}
terraform-dev.tfvars
cidr_blocks = [
  { cidr_block = "10.0.0.0/16", name = "dev-vpc" },
  { cidr_block = "10.0.10.0/24", name = "dev-subnet" }
]
Environmental Variables
export AWS_SECRET_ACCESS_KEY=
export AWS_ACCESS_KEY_ID=
main.tf
provider "aws" {
  region = "us-east-1"
}
-
When you switch terminal windows, the envs disappear
-
Use aws configure to set values globally
.aws/credentials
-
Can exclude region as well
- Set
AWS_DEFAULT_REGION
- Set
Set Variable Using TF environment variable
export TF_VAR_avail_zone="us-east-1"
main.tf
variable avail_zone {}

resource "aws_subnet" "dev-subnet-1" {
  vpc_id = aws_vpc.development-vpc.id
  cidr_block = var.cidr_blocks[1].cidr_block
  availability_zone = var.avail_zone
  tags = {
    Name: var.cidr_blocks[1].name
  }
}
Create Git repo for local terraform
- Ignored files
.terraformfoldertfstatefiles- Terraform variable files
Automate provisioning EC2 with Terraform - 1
- Demo Overview
- Provision an EC2 Instance on AWS infrastructure
- Run nginx Docker container on EC2 instance
- Steps
- Create custom VPC
- Create custom Subnet in one AZ
- Create Route Table and Internet Gateway
- Provision EC2 Instance in subnet
- Deploy nginx Docker container
- Create Security Group (Firewall)
- Best practice
- Create infrastructure from scratch (VPC, subnet, etc)
- Leave default VPC by AWS as is
VPC & Subnet
main.tf
provider "aws" {
  region = "us-east-1"
}

variable "vpc_cidr_block" {}
variable "subnet_cidr_block" {}
variable "avail_zone" {}
variable "env_prefix" {}

resource "aws_vpc" "myapp-vpc" {
  cidr_block = var.vpc_cidr_block

  tags = {
    Name: "${var.env_prefix}-vpc",
  }
}

resource "aws_subnet" "myapp-subnet-1" {
  vpc_id = aws_vpc.myapp-vpc.id
  cidr_block = var.subnet_cidr_block
  availability_zone = var.avail_zone
  tags = {
    Name: "${var.env_prefix}-subnet-1"
  }
}
terraform.tfvars
vpc_cidr_block = "10.0.0.0/16"
subnet_cidr_block = "10.0.10.0/24"
avail_zone = "us-east-1a"
env_prefix = "dev"
terraform plan
terraform --auto-approve
Route Table and Internet Gateways
- Components created
- Route Table
- Like a virtual router in the VPC
- Decides where traffic will be forwarded to
local- within the VPC
- Network ACL
- Firewall config for the VPC
- Applies to subnets in that VPC
- SG - Security Group
- Server level
- Closed by default
- NACL - Network Access Control List
- Subnet level
- Open by default
- Route Table
- Best Practice
- Create new components instead of using default ones
- The first entry for the Route Table is created automatically by AWS so we don't specify it
main.tf
provider "aws" {
  region = "us-east-1"
}

variable "vpc_cidr_block" {}
variable "subnet_cidr_block" {}
variable "avail_zone" {}
variable "env_prefix" {}

resource "aws_vpc" "myapp-vpc" {
  cidr_block = var.vpc_cidr_block

  tags = {
    Name: "${var.env_prefix}-vpc",
  }
}

resource "aws_subnet" "myapp-subnet-1" {
  vpc_id = aws_vpc.myapp-vpc.id
  cidr_block = var.subnet_cidr_block
  availability_zone = var.avail_zone
  tags = {
    Name: "${var.env_prefix}-subnet-1"
  }
}

---------------------------------------------------
resource "aws_route_table" "myapp-route-table" {
  vpc_id = aws_vpc.myapp-vpc.id

  route {
    cidr_block = "0.0.0.0/0"
    gateway_id = aws_internet_gateway.myapp-igw.id
  }

  tags = {
    Name: "${var.env_prefix}-rtb"
  }
}

resource "aws_internet_gateway" "myapp-igw" {
  vpc_id = aws_vpc.myapp-vpc.id

  tags = {
    Name: "${var.env_prefix}-igw"
  }
}
Subnet Association with Route Table
- We need to associate subnets with the Route Table
- If a subnet is not associated with any route table, it is automatically assigned to the main route table in the VPC.
main.tf
resource "aws_route_table_association" "assoc-rtb-subnet" {
  route_table_id = aws_route_table.myapp-route-table.id
  subnet_id = aws_subnet.myapp-subnet-1.id
}
Use Main Route Table
- Remove custom route table and association
- Associate internet gateway with main route table
- To get default rtb id
terraform state show aws_vpc.myapp-vpc
main.tf
provider "aws" {
  region = "us-east-1"
}

variable "vpc_cidr_block" {}
variable "subnet_cidr_block" {}
variable "avail_zone" {}
variable "env_prefix" {}

resource "aws_vpc" "myapp-vpc" {
  cidr_block = var.vpc_cidr_block

  tags = {
    Name: "${var.env_prefix}-vpc",
  }
}

resource "aws_subnet" "myapp-subnet-1" {
  vpc_id = aws_vpc.myapp-vpc.id
  cidr_block = var.subnet_cidr_block
  availability_zone = var.avail_zone
  tags = {
    Name: "${var.env_prefix}-subnet-1"
  }
}

resource "aws_internet_gateway" "myapp-igw" {
  vpc_id = aws_vpc.myapp-vpc.id

  tags = {
    Name: "${var.env_prefix}-igw"
  }
}

----------------------------------------------------------------------
resource "aws_default_route_table" "main-rtb" {
  default_route_table_id = aws_vpc.myapp-vpc.default_route_table_id

  route {
    cidr_block = "0.0.0.0/0"
    gateway_id = aws_internet_gateway.myapp-igw.id
  }

  tags = {
    Name: "${var.env_prefix}-main-rtb"
  }
}
Security Groups
- Types of rules
- Incoming traffic -
ingressSSHinto EC2- Access from browser
- Outgoing traffic -
egress- Installations
- Fetching Docker images
- Incoming traffic -
- Whenever we create a new VPC, AWS creates a default SG
main.tf
# Security Group
resource "aws_security_group" "myapp-sg" {
  name = "myapp-sg"
  vpc_id = aws_vpc.myapp-vpc.id

  ingress {
    from_port = 22
    protocol  = "tcp"
    to_port   = 22
    cidr_blocks = [var.my_ip]
  }

  ingress {
    from_port = 8080
    protocol  = "tcp"
    to_port   = 8080
    cidr_blocks = ["0.0.0.0/0"]
  }

  egress {
    from_port = 0
    protocol  = "-1"
    to_port   = 0
    cidr_blocks = ["0.0.0.0/0"]
    prefix_list_ids = []
  }

  tags = {
    Name: "${var.env_prefix}-sg"
  }
}
Use Default SG
main.tf
# Security Group
resource "aws_default_security_group" "myapp-default-sg" {
  vpc_id = aws_vpc.myapp-vpc.id

  ingress {
    from_port = 22
    protocol  = "tcp"
    to_port   = 22
    cidr_blocks = [var.my_ip]
  }

  ingress {
    from_port = 8080
    protocol  = "tcp"
    to_port   = 8080
    cidr_blocks = ["0.0.0.0/0"]
  }

  egress {
    from_port = 0
    protocol  = "-1"
    to_port   = 0
    cidr_blocks = ["0.0.0.0/0"]
    prefix_list_ids = []
  }

  tags = {
    Name: "${var.env_prefix}-default-sg"
  }
}
Automate provisioning EC2 with Terraform - 2
- AMI - Amazon Machine Image
- You can create your own AMIs
- Required attributes for EC2
- AMI
- Instance type
- Subnets, Security Groups, etc. are optional
- Not specifying it results in the instance being created in the default VPC
- Create
SSHkey-pair- Modify permission
chmod 400 <file>
main.tf
# Data for AWS AMI
data "aws_ami" "latest-amazon-linux-image" {
  most_recent = true
  owners = ["amazon"]
  filter {
    name   = "name"
    values = ["amzn2-ami-kernel-*-x86_64-gp2"]
  }
  filter {
    name   = "virtualization-type"
    values = ["hvm"]
  }
}

output "aws_ami_id" {
  value = data.aws_ami.latest-amazon-linux-image.id
}

# EC2 instance
resource "aws_instance" "myapp-server" {
  ami = data.aws_ami.latest-amazon-linux-image.id
  instance_type = var.instance_type

  subnet_id = aws_subnet.myapp-subnet-1.id
  vpc_security_group_ids = [aws_default_security_group.myapp-default-sg.id]
  availability_zone = var.avail_zone

  associate_public_ip_address = true
  key_name = "devops-ec2"

  tags = {
    Name = "${var.env_prefix}-server"
  }
}
Automating SSH Key-Pair
- Locally, you can create your own private-public key pair
main.tf
# Output EC2 public IP
output "ec2_public_ip" {
  value = aws_instance.myapp-server.public_ip
}

# SSH Key
resource "aws_key_pair" "ssh-key" {
  key_name = "ec2-server-key"
  public_key = file(var.public_key_location)
#  public_key = var.public_key
}
ssh -i .ssh/id_rsa ec2-user@ip-address
- Automate as much as possible
- You may forget to delete components when cleaning up
- Environment replication
- Have to document everything or remember
Automate provisioning EC2 with Terraform - 3
- We want to automate installing and deploying our docker app
user-datarun when the instance is being initiated not modified
main.tf
# EC2 instance
resource "aws_instance" "myapp-server" {
  ami = data.aws_ami.latest-amazon-linux-image.id
  instance_type = var.instance_type

  subnet_id = aws_subnet.myapp-subnet-1.id
  vpc_security_group_ids = [aws_default_security_group.myapp-default-sg.id]
  availability_zone = var.avail_zone

  associate_public_ip_address = true
  key_name = aws_key_pair.ssh-key.key_name

  user_data = <<EOF
    #!/bin/bash
    sudo yum update -y && sudo yum install -y docker
    sudo systemctl start docker
    sudo usermod -aG docker ec2-user
    docker run -p 8080:80 nginx
  EOF

  tags = {
    Name = "${var.env_prefix}-server"
  }
}
Extract To Shell Script
main.tf
# EC2 instance
resource "aws_instance" "myapp-server" {
  ami = data.aws_ami.latest-amazon-linux-image.id
  instance_type = var.instance_type

  subnet_id = aws_subnet.myapp-subnet-1.id
  vpc_security_group_ids = [aws_default_security_group.myapp-default-sg.id]
  availability_zone = var.avail_zone

  associate_public_ip_address = true
  key_name = aws_key_pair.ssh-key.key_name

  user_data = file("entry-script.sh")

  tags = {
    Name = "${var.env_prefix}-server"
  }
}
entry-script.sh
#!/bin/bash
sudo yum update -y && sudo yum install -y docker
sudo chmod 666 /var/run/docker.sock
sudo systemctl start docker
sudo usermod -aG docker ec2-user
docker run -p 8080:80 nginx
- Once the infrastructure is there, Terraform doesn’t help further with installing the tools that will run on the server
- Can execute scripts but we can't even debug when there is an issue in the script
- Terraform
- Initial infrastructure setup
- Manage infrastructure
- Initial application setup
- Configuring existing infrastructures
- Chef
- Puppet
- Ansible
Provisioners in terraform
- Executing cmds on virtual server
- Done using
user_dataattribute - Initial data when launching the instance
- Passed to the cloud providers
- The commands or scripts will be handed over from Terraform to the Cloud Provider
- Done using
- There are ways to execute commands from Terraform
remote-execprovisioner- Invokes script on a remote server after it is created
fileprovisioner- copy files or directories from local to newly created resource
local-execprovisioner- Invokes a local executable after a resource is created
- Locally, NOT created on the resource
- Difference
user_data: passing data to AWSremote-exec: connect via ssh using Terraform
- Can have other connections in the provisioner block
main.tf
# EC2 instance
resource "aws_instance" "myapp-server" {
  ami = data.aws_ami.latest-amazon-linux-image.id
  instance_type = var.instance_type

  subnet_id = aws_subnet.myapp-subnet-1.id
  vpc_security_group_ids = [aws_default_security_group.myapp-default-sg.id]
  availability_zone = var.avail_zone

  associate_public_ip_address = true
  key_name = aws_key_pair.ssh-key.key_name

#  user_data = file("entry-script.sh")

  connection {
    type = "ssh"
    host = self.public_ip
    user = "ec2-user"
    private_key = file(var.private_key_location)
  }

  provisioner "file" {
    source = "entry-script.sh"
    destination = "/home/ec2-user/entry-script-on-ec2.sh"
  }

  provisioner "remote-exec" {
     script = file("entry-script-on-ec2.sh") # File must already exist on server
#    inline = [
#      "export ENV=dev",
#      "mkdir newdir"
#    ]
  }

  provisioner "local-exec" {
    command = "echo ${self.public_ip} > output.txt"
  }
- Provisioners are not recommended by Terraform
- Are a last resort
- Used as a workaround if you must execute commands using Terraform
- There might be unexpected behaviours
- Use
user_dataif available - Breaks idempotency concept
- Breaks current-desired state comparison
- Best practices
- Alternative to
remote-exec- Use config management tools
- Once server is provisioned, hand over to those tools
- Alternative to
local-exec- use
localprovider - Can track desired and actual state
- use
- Scripts
- Execute scripts separate from Terraform
- From CI/CD tool
- Alternative to
- Provisioner failure
- When provisioner fails, Terraform marks the resource as failed
Modules in Terraform - Part 1
- Without modules we'll have
- Complex configurations
- Huge file
- No overview
- Module
- Container for multiple resources used together
- Why Modules?
- Organize and group configurations
- Encapsulate into distinct logical components
- Re-use
- Can customize with variables
- A module should be a proper/logical abstraction
- We can create our own modules
- We can also use existing modules
- Created by Terraform or other companies
Modules in Terraform - Part 2 and 3
Modularize Project
- Project structure
main.tfvariables.tfoutputs.tfproviders.tf
- We don't have to link and reference these files
Create a Module
- Each module will have its
main.tf,outputs.tfandvariables.tf - We normally have
- root module
/modules= "child modules"- A child module is a module that is called by another configuration
- When creating a module, it should group a couple of resources together
- Group multiple resources into a logical unit
- Should group at least 3 or 4 resources
Module Output
-
How do we access the resources of a child module?
-
Need to
outputthe resource object- Like return value of a module to expose/export resource attributes to parent module
-
Whenever a module is added/changed, run terraform init
Automate provisioning EKS cluster with Terraform - Part 1
- Previously
- No version control (history)
- No simple replication of infrastructure possible
- No simple clean-up
- Team collaboration difficult
Create VPC
- The VPC we created with Terraform earlier was a simple VPC. It did not have EKS-specific configurations
- We need something like the CloudFormation template we used before
- We'll use an already existing module
- Module gets downloaded on terraform init
- VPC best practice
- 1 private and 1 public subnet in each AZ
- Tags - use cases
- For human consumption: to have more information
- Label for referencing components from other components (programmatically)
- Kubernetes cloud control manager needs to know which resources to talk to
- Which VPC should be used in the cluster
- Which subnets should be used in the cluster
- Kubernetes cloud control manager needs to know which resources to talk to
- The Cloud Native LoadBalancer is created in the public subnet
- The private subnet gets an internal LoadBalancer service
- Tags are required for the public and private subnets
VPC configuration
provider "aws" {
  region = "us-east-1"
}

variable "vpc_cidr_block" {}
variable "private_subnets_cidr_blocks" {}
variable "public_subnets_cidr_blocks" {}

data "aws_availability_zones" "azs" {

}

module "myapp-vpc" {
  source  = "terraform-aws-modules/vpc/aws"
  version = "4.0.1"

  name = "myapp-vpc"
  cidr = var.vpc_cidr_block
  private_subnets = var.private_subnets_cidr_blocks
  public_subnets = var.public_subnets_cidr_blocks
#  azs = data.aws_availability_zones.azs.names

  # Manual
  azs = ["us-east-1a", "us-east-1b", "us-east-1c", "us-east-1d", "us-east-1f"]

  enable_nat_gateway = true
  single_nat_gateway = true
  enable_dns_hostnames = true

  tags = {
    "kubernetes.io/cluster/myapp-eks-cluster" = "shared"
  }

  public_subnet_tags = {
    "kubernetes.io/cluster/myapp-eks-cluster" = "shared"
    "kubernetes.io/role/elb" = 1
  }

  private_subnet_tags = {
    "kubernetes.io/cluster/myapp-eks-cluster" = "shared"
    "kubernetes.io/role/internal-elb"= 1
  }
}
Automate provisioning EKS cluster with Terraform - Part 2
EKS Cluster & Worker Nodes
- Good practice to version our modules
- Subnets
- Private: Our workload
- Public: External resources like the Loadbalancer
- Worker node types
- Self-managed - EC2
- Semi-managed - Node Group
- Managed - Fargate
- Module used: AWS EKS
eks-cluster.tf
module "eks" {
  source  = "terraform-aws-modules/eks/aws"
  version = "19.12.0"

  cluster_name = "myapp-eks-cluster"
  cluster_version = "1.25"

  subnet_ids = module.myapp-vpc.private_subnets
  vpc_id = module.myapp-vpc.vpc_id

  worker_groups = [
    {
      instance_type = "t3.micro"
      name = "worker-group-1"
      asg_desired_capacity = 2
    },
    {
      instance_type = "t2.small"
      name = "worker-group-1"
      asg_desired_capacity = 1
    }
  ]

  tags = {
    environment = "development"
    application = "myapp"
  }
}
Authenticate with K8s Cluster
- We need to configure a K8s provider
- Repo: https://gitlab.com/nanuchi/terraform-learn/-/tree/feature/eks/
- Main: https://gitlab.com/nanuchi/terraform-learn
eks-cluster.tf
provider "kubernetes" {
  load_config_file = "false"
  host = data.aws_eks_cluster.myapp-cluster.endpoint
  token = data.aws_eks_cluster_auth.myapp_cluster.token
  cluster_ca_certificate = base64decode(data.aws_eks_cluster.myapp-cluster.certificate_authority.0.data)
}

data "aws_eks_cluster" "myapp-cluster" {
  name = module.eks.cluster_id
}

data "aws_eks_cluster_auth" "myapp_cluster" {
  name = module.eks.cluster_id
}

module "eks" {
  source  = "terraform-aws-modules/eks/aws"
  version = "19.12.0"

  cluster_name = "myapp-eks-cluster"
  cluster_version = "1.25"

  subnet_ids = module.myapp-vpc.private_subnets
  vpc_id = module.myapp-vpc.vpc_id


    self_managed_node_groups = [
    {
      instance_type = "t3.micro"
      name = "worker-group-1"
      asg_desired_capacity = 2
    },
    {
      instance_type = "t2.small"
      name = "worker-group-1"
      asg_desired_capacity = 1
    }
  ]

  tags = {
    environment = "development"
    application = "myapp"
  }
}
NB: API has been updated, so self-managed nodes may have issues
EKS managed nodes
module "eks" {
  source  = "terraform-aws-modules/eks/aws"
  version = "19.13.1"

  cluster_name = "myapp-eks-cluster"
  cluster_version = "1.26"

  subnet_ids = module.myapp-vpc.private_subnets
  vpc_id = module.myapp-vpc.vpc_id

  cluster_endpoint_public_access = true

  tags = {
    environment = "development"
    application = "myapp"
  }

  eks_managed_node_groups = {
    dev = {
      min_size     = 1
      max_size     = 3
      desired_size = 3

      instance_types = ["t3.micro"]
    }
  }
}
Automate provisioning EKS cluster with Terraform - Part 3
NAT(Network Address Translation) route allows theworkernodes to connect to themasternodes- They are in different VPCs
- Private subnets are associated with the
NATGateway - Public subnets are associated with the
InternetGateway
Connect to cluster
aws eks update-kubeconfig --name myapp-eks-cluster --region us-east-1
Deploy Nginx App Into Cluster
k apply -f nginx-config.yaml
Destroy Components
terraform destroy --auto-approve
Complete CI/CD with Terraform - Part 1
- We want to automate provisioning server
- We'll provision a server using Terraform before we deploy to it
- Steps
- Create
SSHkey-pair - Install Terraform inside Jenkins container
- Must install terraform in jenkins container
- Add terraform configuration to provision server
- Create
- Repository
Complete CI/CD with Terraform - Part 2
Create SSH Key-Pair
- Create key-pair on admin console
- Send pem file to jenkins
- Create new credential (ssh)
Install Terraform Inside Jenkins Container
docker execinto the container as the root user
docker exec -it -u 0 28643b51d6ad bash
Check OS
cat /etc/os-release
Terraform Configuration Files
main.tf
provider "aws" {
  region = var.region
}

# VPC
resource "aws_vpc" "myapp-vpc" {
  cidr_block = var.vpc_cidr_block

  tags = {
    Name: "${var.env_prefix}-vpc",
  }
}

# Subnet
resource "aws_subnet" "myapp-subnet-1" {
  vpc_id = aws_vpc.myapp-vpc.id
  cidr_block = var.subnet_cidr_block
  availability_zone = var.avail_zone
  tags = {
    Name: "${var.env_prefix}-subnet-1"
  }
}

# Internet gateway
resource "aws_internet_gateway" "myapp-igw" {
  vpc_id = aws_vpc.myapp-vpc.id

  tags = {
    Name: "${var.env_prefix}-igw"
  }
}

# Default route table
resource "aws_default_route_table" "main-rtb" {
  default_route_table_id = aws_vpc.myapp-vpc.default_route_table_id

  route {
    cidr_block = "0.0.0.0/0"
    gateway_id = aws_internet_gateway.myapp-igw.id
  }

  tags = {
    Name: "${var.env_prefix}-main-rtb"
  }
}

# Security Group
resource "aws_default_security_group" "myapp-default-sg" {
  vpc_id = aws_vpc.myapp-vpc.id

  ingress {
    from_port = 22
    protocol  = "tcp"
    to_port   = 22
    cidr_blocks = [var.my_ip]
  }

  ingress {
    from_port = 8080
    protocol  = "tcp"
    to_port   = 8080
    cidr_blocks = ["0.0.0.0/0"]
  }

  egress {
    from_port = 0
    protocol  = "-1"
    to_port   = 0
    cidr_blocks = ["0.0.0.0/0"]
    prefix_list_ids = []
  }

  tags = {
    Name: "${var.env_prefix}-default-sg"
  }
}

# Data for AWS AMI
data "aws_ami" "latest-amazon-linux-image" {
  most_recent = true
  owners = ["amazon"]
  filter {
    name   = "name"
    values = ["amzn2-ami-kernel-*-x86_64-gp2"]
  }
  filter {
    name   = "virtualization-type"
    values = ["hvm"]
  }
}

# EC2 instance
resource "aws_instance" "myapp-server" {
  ami = data.aws_ami.latest-amazon-linux-image.id
  instance_type = var.instance_type

  subnet_id = aws_subnet.myapp-subnet-1.id
  vpc_security_group_ids = [aws_default_security_group.myapp-default-sg.id]
  availability_zone = var.avail_zone

  associate_public_ip_address = true
  key_name = "myapp-key-pair"

  user_data = file("entry-script.sh")

  tags = {
    Name = "${var.env_prefix}-server"
  }
}

# Output EC2 public IP
output "ec2_public_ip" {
  value = aws_instance.myapp-server.public_ip
}
variables.tf
variable "region" {
  default = "us-east-1"
}

variable "vpc_cidr_block" {
  default = "10.0.0.0/16"
}
variable "subnet_cidr_block" {
  default = "10.0.10.0/24"
}
variable "avail_zone" {
  default = "us-east-1b"
}
variable "env_prefix" {
  default = "dev"
}
variable "my_ip" {
  default = "41.155.1.65"
}
variable "instance_type" {
  default = "t3.micro"
}
Provision Stage In Jenkins
Jenkinsfile
stage('provision server') {
    environment {
        AWS_ACCESS_KEY_ID = credentials('jenkins_aws_access_key_id')
        AWS_SECRET_ACCESS_KEY = credentials('jenkins_aws_secret_access_key_id')
        TF_VAR_env_prefix = 'test'
    }

    steps {
        script {
            dir('terraform') {
                sh "terraform init"
                sh "terraform apply --auto-approve"
                EC2_PUBLIC_IP = sh(
                    script: "terraform output ec2_public_ip",
                    returnStdout: true
                ).trim()
            }
        }
    }
}
Complete CI/CD with Terraform - Part 3
Deploy Stage In Jenkinsfile
- Need docker credentials for pulling private image on EC2 server
Jenkinsfile
stage("deploy") {
    environment {
        DOCKER_CREDS = credentials('docker-hub-repo')
    }
    steps {
        script {
            echo "waiting for EC2 server to initialize"
//          Can add check to check if instance is initialized
            sleep(time: 120, unit: "SECONDS")

            echo 'deploying docker image to EC2...'
            echo "${EC2_PUBLIC_IP}"

            def shellCmd = "bash ./server-cmds.sh ${IMAGE_NAME} ${DOCKER_CREDS_USR} ${DOCKER_CREDS_PSW}"
            def ec2Instance = "ec2-user@${EC2_PUBLIC_IP}"

            sshagent(['server-ssh-key']) {
                sh "scp -o StrictHostKeyChecking=no server-cmds.sh ${ec2Instance}:/home/ec2-user"
                sh "scp -o StrictHostKeyChecking=no docker-compose.yaml ${ec2Instance}:/home/ec2-user"
                sh "ssh -o StrictHostKeyChecking=no ${ec2Instance} ${shellCmd}"
            }
        }
    }
}
server-cmds.sh
#!/usr/bin/env bash

export IMAGE=$1
export DOCKER_USER=$2
export DOCKER_PWD=$3
echo $DOCKER_PWD | docker login -u $DOCKER_USER --password-stdin
docker-compose -f docker-compose.yaml up --detach
echo "success"
docker-compose.yaml
version: '3.8'
services:
  java-maven-app:
    image: ${IMAGE}
    ports:
      - "8080:8080"
  postgres:
    image: postgres
    ports:
      - "5432:5432"
    environment:
      - POSTGRES_PASSWORD=my-pwd
Destroy all components and run CI/CD
- Easiest way is to destroy it from Jenkins
- In replay, edit provision stage to destroy infrastructure with --auto-approve
- Repo:
java-maven-app - Branch:
jenkins-terraform
Remote State in Terraform
- Problem
- Each user / CI server must make sure they always have the latest state data before running Terraform
- How do we share the same Terraform state file?
- Configure a remote Terraform State
- TF writes the data to this remote data source
- Different remote storage options possible
- Data backup
- Can be shared
- Keep sensitive data off disk
Configure Remote Storage
- Terraform block is for configuring metadata and information about Terraform itself
- Backends
- Determine how state is loaded / stored
- default: local storage
main.tf
terraform {
  required_version = ">= 0.12"
  backend "s3" {
    bucket = "alfreds-myapp-bucket"
    key = "myapp/state.tfstate"
    region = "us-east-1"
  }
}

provider "aws" {
  region = var.region
}
Create Bucket
- Good practice to enable bucket versioning
Use File Locally
terraform init
terraform state list